How to Install RADIUS Manager 4 on CentOS 7
This formal legacy lab guide explains how the RADIUS Manager 4 stack fits together on CentOS 7, including Apache, PHP, MariaDB, ionCube and FreeRADIUS. It also replaces unsafe historical shortcuts with restricted firewall rules, controlled permissions and clear validation steps.
Important Support and Security Notice
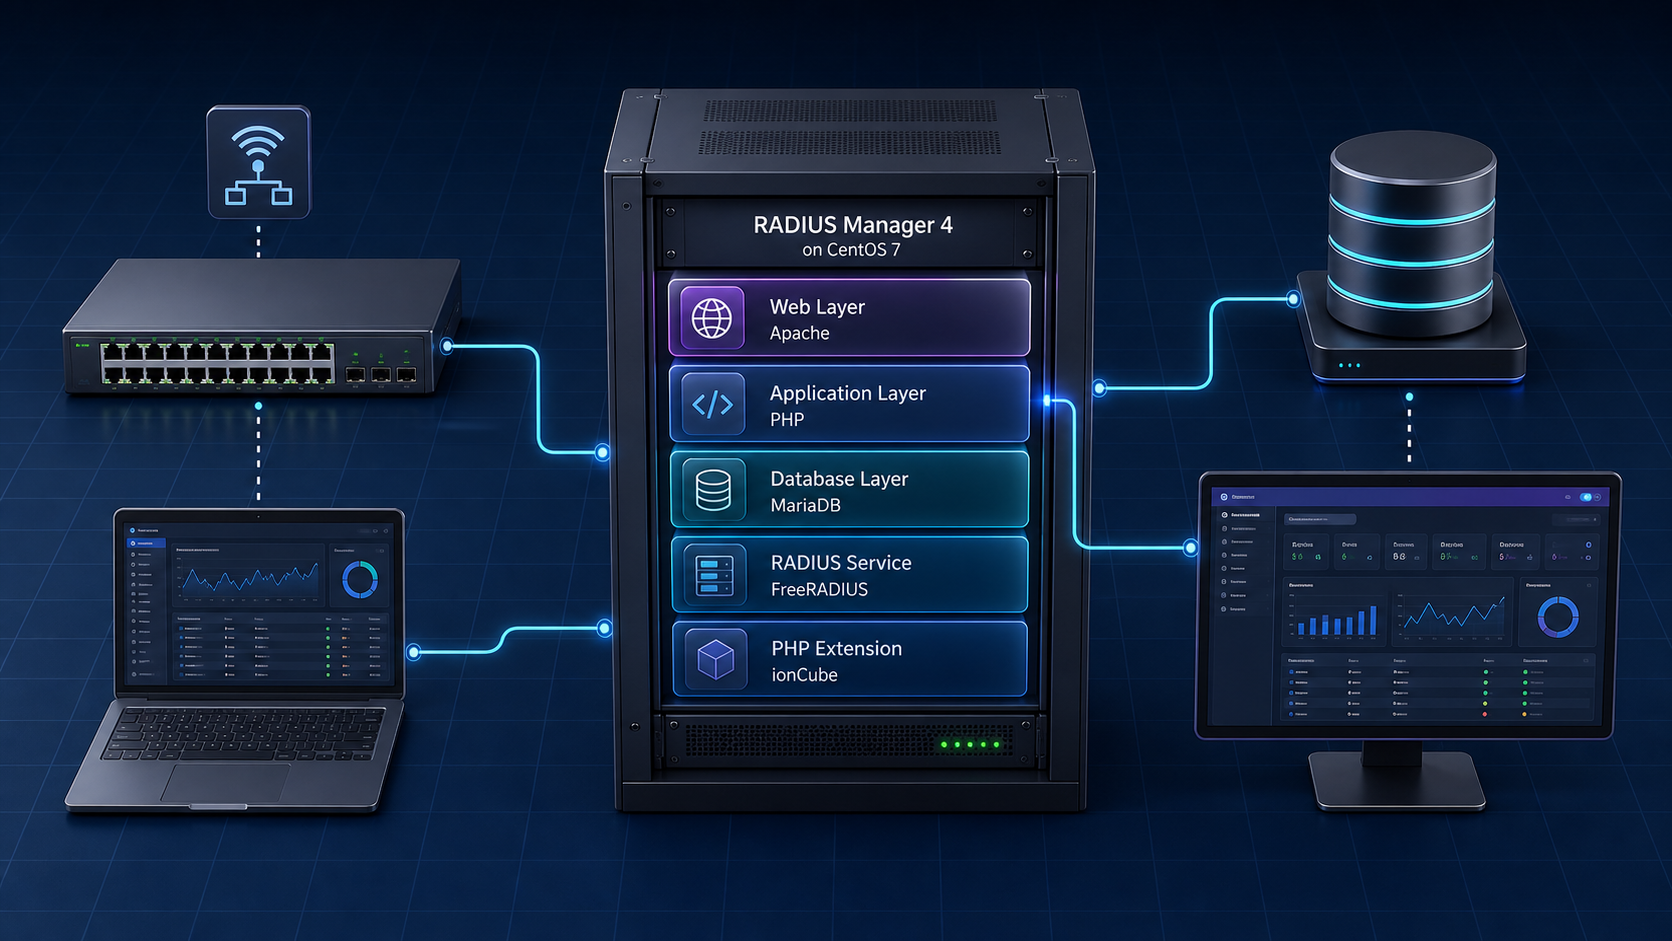
Installation Guide Contents
1. Confirm Prerequisites and Compatibility
Do not begin with package installation. First confirm that the application files, license and encoded PHP files match the operating system architecture and PHP version available in your lab.
- CentOS 7 x86_64 lab: use a clean virtual machine with a fixed management IP address and a snapshot taken before installation.
- Licensed software: obtain the RADIUS Manager archive and the matching
lic.txtandmod.txtfiles from the official customer portal. - Version matrix: confirm the required PHP, ionCube Loader, FreeRADIUS and database versions with the application vendor.
- Repository access: because CentOS 7 is archived, use an approved internal mirror or a controlled vendor-supported repository source.
- Network isolation: keep the host away from untrusted networks and allow management access only from a trusted administrator subnet.
cat /etc/centos-release
uname -m
ip address show
timedatectl status
2. Prepare CentOS, Apache, PHP and MariaDB
Update the approved package source, install only the components required by your confirmed version matrix, and enable the core services.
sudo yum update -y
sudo yum install -y httpd mariadb-server mariadb \
  php php-mysql php-gd php-snmp php-process \
  net-snmp net-snmp-utils wget curl tar make gcc \
  libtool-ltdl cronie psmisc net-tools

sudo systemctl enable --now mariadb
sudo systemctl enable --now httpd
sudo mysql_secure_installation
If the vendor build requires 32-bit compatibility libraries on an x86_64 host, install them only after confirming that requirement:
sudo yum install -y glibc.i686 libgcc.i686ADMIN_SUBNET_CIDR="192.0.2.0/24"
NAS_SUBNET_CIDR="198.51.100.0/24"
sudo firewall-cmd --permanent --add-rich-rule="rule family='ipv4' source address='${ADMIN_SUBNET_CIDR}' service name='http' accept"
sudo firewall-cmd --permanent --add-rich-rule="rule family='ipv4' source address='${ADMIN_SUBNET_CIDR}' service name='https' accept"
sudo firewall-cmd --permanent --add-rich-rule="rule family='ipv4' source address='${NAS_SUBNET_CIDR}' port port='1812' protocol='udp' accept"
sudo firewall-cmd --permanent --add-rich-rule="rule family='ipv4' source address='${NAS_SUBNET_CIDR}' port port='1813' protocol='udp' accept"
sudo firewall-cmd --reload
sudo firewall-cmd --list-all3. Create the RADIUS Databases and Accounts
Create separate databases and local-only service accounts. Replace the example passwords with unique values stored in a password manager; do not reuse the values shown below.
sudo mysql -u root -p

CREATE DATABASE radius CHARACTER SET utf8 COLLATE utf8_general_ci;
CREATE DATABASE conntrack CHARACTER SET utf8 COLLATE utf8_general_ci;

CREATE USER 'radius'@'localhost' IDENTIFIED BY 'REPLACE_WITH_STRONG_PASSWORD';
CREATE USER 'conntrack'@'localhost' IDENTIFIED BY 'REPLACE_WITH_ANOTHER_PASSWORD';

GRANT ALL PRIVILEGES ON radius.* TO 'radius'@'localhost';
GRANT ALL PRIVILEGES ON conntrack.* TO 'conntrack'@'localhost';
FLUSH PRIVILEGES;
EXIT;
Keep MariaDB bound to localhost unless the architecture specifically places the database on a protected remote server. Confirm that the service is running before continuing.
systemctl status mariadb --no-pager
sudo mysql -u radius -p -e "SHOW DATABASES;"
4. Install the Matching ionCube Loader
RADIUS Manager uses encoded PHP files, so the Loader must match both the installed PHP branch and system architecture. Check the environment first and use the official ionCube Loader Wizard or the vendor-provided compatibility instructions.
php -v
php --ini
php -i | grep -E "extension_dir|Thread Safety"
uname -m
After downloading the correct official archive and verifying its checksum, place only the matching Loader in the PHP extension directory. This example assumes 64-bit PHP 5.4; change the filename and destination to match your actual output.
tar -xzf ioncube_loaders_lin_x86-64.tar.gz
sudo install -m 0755 ioncube/ioncube_loader_lin_5.4.so \
  /usr/lib64/php/modules/ioncube_loader_lin_5.4.so
sudo restorecon -v /usr/lib64/php/modules/ioncube_loader_lin_5.4.so
Add the extension to the active PHP configuration, restart Apache and verify that PHP reports ionCube successfully.
zend_extension=/usr/lib64/php/modules/ioncube_loader_lin_5.4.so

sudo apachectl configtest
sudo systemctl restart httpd
php -v
php -m | grep -i ioncubechmod 777 on PHP modules or application files.5. Build and Test the Vendor-Compatible FreeRADIUS Package
Older RADIUS Manager releases may require a vendor-patched FreeRADIUS source package. Download it only from the official vendor portal, record its checksum and extract it in a temporary build directory.
sha256sum freeradius-server-VENDOR-VERSION.tar.gz
tar -xzf freeradius-server-VENDOR-VERSION.tar.gz
cd freeradius-server-VENDOR-VERSION
./configure
make
sudo make install
Run FreeRADIUS in foreground debug mode before integrating the web application. A successful startup ends with a ready-to-process message and exposes configuration or certificate errors immediately.
sudo radiusd -XStop debug mode with Ctrl+C. Do not start a second daemon while the debug process is still bound to UDP ports 1812 and 1813.
6. Install RADIUS Manager and Its License
Copy the licensed RADIUS Manager archive to the server through a protected transfer method such as SFTP. Verify the archive, extract it and run the supplied installer from the local working directory.
sha256sum radiusmanager-4.x.tar.gz
tar -xzf radiusmanager-4.x.tar.gz
cd radiusmanager-4.x
chmod 0755 install.sh
sudo ./install.sh
Follow the installer prompts using the database names and local service accounts created earlier. Then place the matching license files in the application directory using restrictive ownership and permissions. Confirm the exact destination with the vendor documentation.
sudo install -o apache -g apache -m 0640 lic.txt \
  /var/www/html/radiusmanager/lic.txt
sudo install -o apache -g apache -m 0640 mod.txt \
  /var/www/html/radiusmanager/mod.txt
sudo restorecon -RFv /var/www/html/radiusmanager
Open the management interface only from the trusted administrator network:
http://SERVER-IP/radiusmanager/admin.phpFor any persistent environment, configure HTTPS before entering reusable administrator credentials.
7. Validate and Secure the Lab
- Service state: verify Apache, MariaDB and the RADIUS daemon are running without repeated errors.
- Listening ports: confirm that only expected interfaces and ports are exposed.
- RADIUS test: create a temporary test client and user, then validate authentication and accounting from a controlled NAS or test utility.
- Web access: restrict the administrator path by source network and enable HTTPS before using real credentials.
- Backups: protect the database, configuration files and license files with encrypted, access-controlled backups.
- Migration plan: document how the service will move to a currently supported platform.
systemctl --no-pager --full status httpd mariadb
sudo ss -lntup
sudo firewall-cmd --list-all
sudo journalctl -u httpd -u mariadb --since today
Keep SELinux enforcing whenever possible. If access is denied, inspect the audit record and correct file labels or policy instead of immediately disabling the control.
getenforce
sudo ausearch -m AVC -ts recent
sudo restorecon -RFv /var/www/html/radiusmanager
8. Troubleshooting Common Installation Problems
- Blank administrator page: compare the PHP and ionCube versions, verify the license files, check PHP memory limits and inspect the Apache error log.
- Wrong ELF class: the Loader architecture does not match PHP; install the correct 32-bit or 64-bit package.
- Database connection fails: verify the local account, password, database grants and MariaDB socket or hostname used by the installer.
- RADIUS ports already in use: stop the foreground debug process before starting the service.
- Permission denied: check ownership, file modes, SELinux labels and audit events. Do not resolve the problem with broad world-writable permissions.
- Package repository errors: CentOS 7 mirrors were retired after end of life. Use only an approved archive or internal mirror and avoid editing repository URLs to insecure HTTP endpoints.
sudo tail -n 100 /var/log/httpd/error_log
sudo journalctl -u httpd -n 100 --no-pager
php -v
php -m | grep -i ioncube
sudo ss -lunp | grep -E ':1812|:1813'
How to Install RADIUS Manager 4 on CentOS 7 Frequently Asked Questions
Can RADIUS Manager 4 still be installed on CentOS 7?
It can be maintained in a controlled legacy lab when all application, license, PHP, ionCube and FreeRADIUS versions are compatible. CentOS 7 is end of life, so a new production deployment should use a platform currently supported by the application vendor.
Should I disable SELinux and firewalld?
No. Keep protective controls enabled where possible. Open only required ports, restrict the web interface to trusted management networks and investigate SELinux denials before considering a temporary lab-only change.
Which ports does the installation normally need?
RADIUS commonly uses UDP 1812 for authentication and UDP 1813 for accounting. The management interface uses HTTP or HTTPS. MariaDB should normally remain accessible only from localhost.
Why is the RADIUS Manager page blank?
The usual causes are an incompatible ionCube Loader, unsupported PHP version, invalid license files, incorrect ownership, SELinux denial, PHP memory exhaustion or another application error shown in the Apache log.
References and Related Reading
- CentOS Linux lifecycle information
- Official ionCube Loaders and Loader Wizard
- RADIUS Protocol: Authentication, Authorization and Accounting
- AAA Security Explained
- Port Checker for approved external reachability tests.
This article was independently rewritten and modernized from legacy installation notes supplied to Networking Essentials. The original reference material was dated March 31, 2015.