Connect a Linux iSCSI Initiator and Mount a LUN
Discover the target, configure CHAP, log in, identify the new disk, and make both the session and filesystem survive a restart.
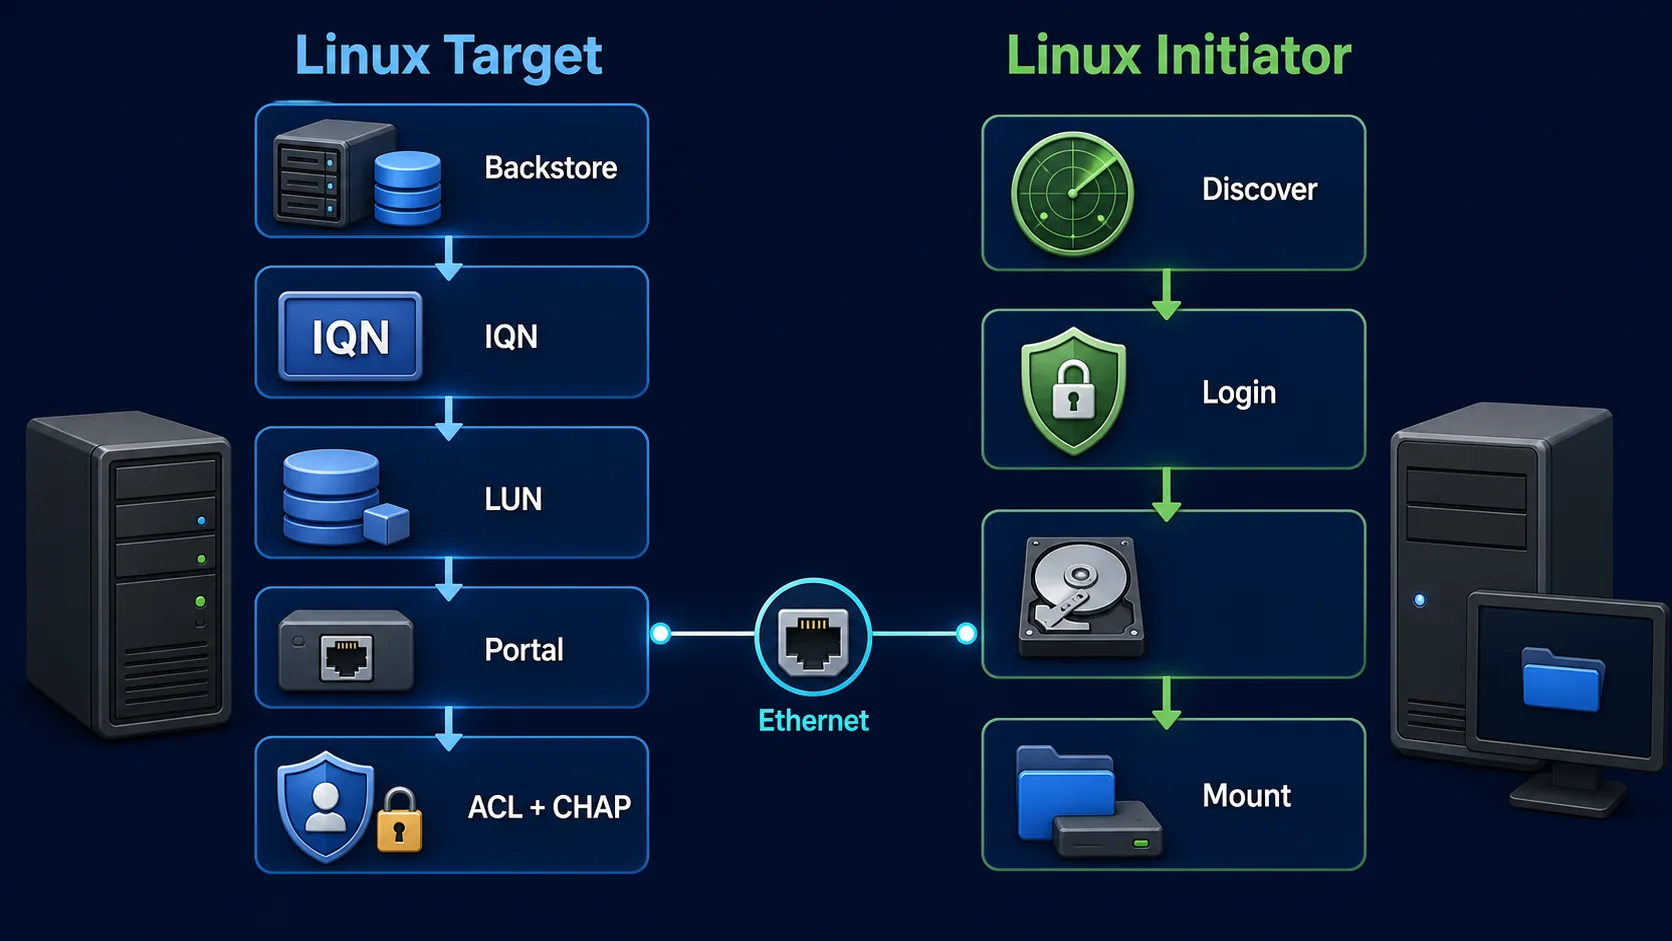
What this guide assumes
The target is already listening at 192.168.50.10:3260, exports iqn.2026-08.in.netest:storage.target01, and has an ACL matching this Linux client's initiator IQN.
/dev/sdb only as an example. Confirm the newly attached device by size, model and session mapping before partitioning or formatting it.Workflow
1. Install and start the initiator
RHEL, Rocky Linux or AlmaLinux
dnf install iscsi-initiator-utils -y
systemctl enable --now iscsid
systemctl enable iscsi
Ubuntu or Debian
apt update
apt install open-iscsi -y
systemctl enable --now iscsid
The main files are /etc/iscsi/iscsid.conf and /etc/iscsi/initiatorname.iscsi.
2. Verify the initiator IQN and discover the target
cat /etc/iscsi/initiatorname.iscsiThe displayed IQN must match the target ACL. If you intentionally change it, restart iscsid and update the target ACL.
iscsiadm -m discovery -t sendtargets -p 192.168.50.10Expected discovery output:
192.168.50.10:3260,1 iqn.2026-08.in.netest:storage.target01Discovery records the target but does not attach its LUN yet.
3. Configure CHAP and log in
Set authentication on this target node rather than placing one global password in iscsid.conf.
iscsiadm -m node \
-T iqn.2026-08.in.netest:storage.target01 \
-p 192.168.50.10:3260 \
--op update -n node.session.auth.authmethod -v CHAP

iscsiadm -m node \
-T iqn.2026-08.in.netest:storage.target01 \
-p 192.168.50.10:3260 \
--op update -n node.session.auth.username -v iscsiuser

iscsiadm -m node \
-T iqn.2026-08.in.netest:storage.target01 \
-p 192.168.50.10:3260 \
--op update -n node.session.auth.password -v 'Use-A-Strong-Secret'
Log in:
iscsiadm -m node \
-T iqn.2026-08.in.netest:storage.target01 \
-p 192.168.50.10:3260 --login
4. Verify the session and identify the new disk
iscsiadm -m session
iscsiadm -m session -P 3
lsblk -o NAME,SIZE,TYPE,FSTYPE,MOUNTPOINTS,MODEL
dmesg | tail -50
The detailed session output links the target and its attached SCSI device. Compare lsblk before and after login, and confirm the expected size.
/dev/sdb. Kernel device names can change after hardware changes or restart.5. Partition, format and mount the new LUN
Create one GPT partition
parted /dev/sdb --script mklabel gpt
parted /dev/sdb --script mkpart primary 0% 100%
partprobe /dev/sdb
lsblk /dev/sdb
Create a filesystem once
mkfs.xfs /dev/sdb1
# Or, choose ext4 instead:
mkfs.ext4 /dev/sdb1
Mount it
mkdir -p /mnt/iscsi-data
mount /dev/sdb1 /mnt/iscsi-data
df -hT /mnt/iscsi-datamkfs on an existing LUN that contains data.6. Configure automatic login and mounting
iscsiadm -m node \
-T iqn.2026-08.in.netest:storage.target01 \
-p 192.168.50.10:3260 \
--op update -n node.startup -v automatic

blkid /dev/sdb1
Add the real filesystem UUID to /etc/fstab. For XFS:
UUID=2a8e16d2-3dbc-4e63-bdc5-331e01234567 /mnt/iscsi-data xfs _netdev,nofail 0 0_netdev tells the system that the mount depends on network storage. Test the entry before rebooting:
umount /mnt/iscsi-data
mount -a
findmnt /mnt/iscsi-data
7. Test the storage and disconnect safely
echo "iSCSI storage test" > /mnt/iscsi-data/test.txt
cat /mnt/iscsi-data/test.txt
sync
findmnt /mnt/iscsi-data
iscsiadm -m session -P 1
When removing the LUN, stop applications, unmount the filesystem, then log out:
fuser -vm /mnt/iscsi-data
umount /mnt/iscsi-data
iscsiadm -m node \
-T iqn.2026-08.in.netest:storage.target01 \
-p 192.168.50.10:3260 --logout
If the node will never be used again, delete its saved record only after a clean logout:
iscsiadm -m node \
-T iqn.2026-08.in.netest:storage.target01 \
-p 192.168.50.10:3260 -o delete
Connect a Linux iSCSI Initiator and Mount a LUN Frequently Asked Questions
How do I discover an iSCSI target in Linux?
Run iscsiadm -m discovery -t sendtargets -p TARGET_IP. Confirm that TCP 3260 is reachable first.
How do I make the connection persistent?
Set node.startup to automatic, enable the initiator services, mount by filesystem UUID and include _netdev.
Why is the disk not showing after login?
Inspect iscsiadm -m session -P 3, lsblk and kernel messages. The target must map a LUN to the ACL for this exact initiator IQN.
Why mount by UUID?
Device names such as /dev/sdb can change. A filesystem UUID identifies the intended filesystem more reliably.
Reference
See Red Hat's Configuring an iSCSI initiator documentation for current service, discovery and persistent-mount guidance.